It's Been Awhile..
Hey everyone! I know it's been awhile since I've posted anything, life has been pretty busy. Although, it has also been very crafty :). I'm here today to share a tutorial on how to make a fancy tin sachet.What would you use it for?
Well, I found them especially useful to store in clothing drawers, linen closets, suitcases or purses, basically anywhere you want to smell good. All it is made from is a tin (Altoids, tea tins, etc.,) spray paint, your choice of scent transportation(potpourri,scented wax,dryer sheets, soaps, etc.) and a bit of elbow grease. This could even be made in a bigger scale, like a cookie tin, and put into rooms to offer a nice fragrance in the air. Can anyone say great gift idea too? It's only about a day project to make one this size, and I honestly could get out of control with making too many! I'm sure these will be seen a lot throughout the blog, just in different forms. The options for designing these are endless, but today I am going to show you one of the ways it can be done. So, without further adieu...Let's Get Craftin'
Step One
So, our first step is to find a tin with which to work with. I happened to have in my cabinet a celestial seasons tin that came with a box of tea I purchased. In order to spray paint the tin, you need something for the paint to grip on to. I sanded the entire outside of the tin using 120 grit sandpaper. If it was not sanded, the spray paint would peel off easily.
Step Two
I wanted to add a bit of a design on top of the tin, so I decided to make a stencil. I cut a piece of paper the size of the top of the tin and penciled a design on it.
Step Three
I used a utility knife to cut the design out of the paper.
Step Four
Place the newly-made stencil onto the tin and trace the design onto the tin using a pencil.
Step Five
Take the stencil off and using your pencil mark where you want your holes to be. The holes lets the scent leak through, so more holes means a stronger smell. So if this was being put into a small area like a drawer, purse, or suitcase I wouldn't put too many holes into it, unless you want the scent very powerful. Many holes would be good for larger spaces like closets, bathrooms, etc.Step Six
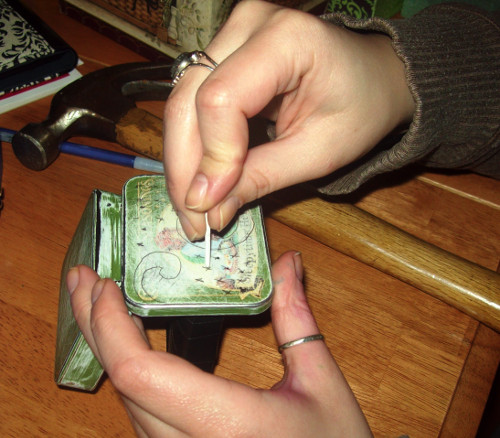
Now this is where it gets a bit tricky...I used a hammer and a small nail to punch the holes through the tin. In order to do this, you must have something hard behind the area you are going to punch holes through, but it also needs to have some give so the nail can penetrate the tin. Their are a bunch of ways to do this such as a block of wood, a sandbag, or what I used, a chunk of a phone book covered in electrical tape(I'm inpatient..:).)
To use what I did, all you have to do is cut a chunk of phone book out, a hack saw was used to do this(thank the love of my life.) And please, try to make it so it can fit inside the tin. I though my chunk would until it was taped up, and no longer fit. It will just make your life easier if it fits, as you will see how I had to balance the chunk in order for the tin to come in contact with it was rather difficult. >.<
And then covered in electrical tape
Step Seven
Using your little block, position it under the lid and get your nail ready. Hammer into the tin until you have a hole. Continue to do this until you have all the holes you want. I wanted nice clean holes, so I hammered until the nail went into the phone book.
Here is the finished result.
Step Eight
Unfortunately, I did not think of taking photos during this stage(sometimes getting lost in the creative process is a big BOO,) but I will explain as best I can what to do next. The next step is to paint your tin. I spray painted the entire tin a flat black and let dry for about six hours. The paint needs to be 100% dry before you try to lay your stencil down, or you will peel up paint. I used my DIY modge podge to adhere the stencil down and then used electrical tape to cover the sides of the tin. Then a gold spray paint was laid down.
Once the gold was dry I peeled the tape off and soaked the stencil off using water and a sponge. I then applied a gloss topcoat to seal it all in.
You're Finished!
Fill and place it where you want it to go! I also have a heart-shaped Altoids tin that I'm going to turn into one of these, so keep on the lookout.
It's Time to Part
As I always say, their are many projects underway, and their is always something for me to rant and rave about. I also recently made a deviantart account, located here, which showcases all of my finished project photos, drawings, and every other artsy-fartsy thing I do. I hope you enjoyed another installment of the Neophytes Guide to Crafting, I'll see ya soon!
Crafts and Kisses,


